Hello all and welcome to a VERY late Pintertest File! Brought to you by Mediacom (#notsponsered) who decided to do "maintenance" this week resulting in us not having a reliable Internet connection for a good chunk of the week! Thanks!
If you live pretty much anywhere in the Midwest like I do, you have recently been experiencing some seriously crappy cold weather. Now I like myself a good winter, but when it gets to be February I am pretty much over it. Luckily for me that is just about when Iowa weather decides to take a turn for the worst and get really cold.
So being that I didn't want to leave my house at all this past week. I had to come up with a Pintertest that could be tested with objects/ingredients that we already had. Throw in every one's love for a tasty baked good and we have this month's file: the brownie in a mug.
Pinterest is FILLED with these single serve baked delights, brownie in a mug, cake in a jar, cookie in a cup, 4 course steak dinner in a mason jug... if you haven't seen a post for one of these, you haven't been browsing Pinterest. But the question that has always lingered on my mind is... do they actually taste good? Tonight we found out.
What You Will Need:
- 2 tablespoons of lightly flavored oil (don't break out the extra virgin olive for this)
- 1/4 cup all-purpose flour
- 2 tablespoons cocoa powder
- 1/4 cup brown sugar
- 1 1/2 tablespoons water
- 1/2 teaspoon vanilla extract
- 1 large egg
- Pinch of salt (optional)
- Mixing Bowls
- Measuring Cups
- Microwave
Step 1: Sift the Dry Ingredients Together
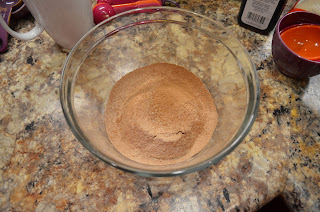
In a mixing bowl sift together the cocoa powder and the flour. Cocoa powder usually has some clumps so sifting is preferred but not absolutely necessary.
Step 2: Whisk the "Wet" Ingredients Together
In a separate mixing bowl whisk together the egg, oil, brown sugar, water, vanilla, and the salt (if used).
Step 3: Whisk Ingredients Together and Pour into Mug
Whisk the wet ingredients into the dry ingredients until combined. Pour into desired mug. I read in multiple sources that a tall skinny mug works best at reducing the chances of the mix rising over the top of the mug while cooking. Since scraping burnt chocolate off microwave floors is just not my scene, I went with that. Whatever you use, just make sure the mug is microwave safe and can hold 12 ounces.
Step 4: Microwave
Clean up any drips around the edges of the mug, then place in the microwave for 1 minute and 45 seconds. You may need more or less time depending on the power of your microwave and the mug being used. Our microwave is an old 950 Watts microwave with a broken turn table. So less time may need to be used in a newer model.
Step 5: Serve
Final Grade and Thoughts:
This tasted pretty damn good. It wasn't a dense fudge-y brownie, it had more of a spongy cake-like texture. But it was tasty and definitely would fill a craving. The recipe was quick and easy enough, although for a "single serving" treat it did produce a lot of dishes (separate mixing bowls). It leaves me wondering how this would turn out if one were to try and stir all the ingredients together directly in the mug. Overall I would recommend this to anyone who would like to indulge in a sweet treat without having a pan of left over brownies tempting them the rest of the week.


2 comments:
Definitely trying this. Tonight.
Let me know what you think!
Post a Comment