
I have an absurd amount of eyeshadow. Absurd. And since it doesn't seem that I will be ridding of myself of this addiction anytime soon, nor am I magically going to be awarded a room entirely for my collection, I needed to find a way to save some space and organize my shadows. Enter in the Z Palette. This cleaver little box allows you to take your shadows out of the original packaging and combine them into a custom layout of your choosing. De-potting was admittedly a bit intimidating when I first researched it, but with a few tips and some patience it quickly became something I was comfortable with. Below is the method I used which has worked best for me. I stayed away from anything using an open flame as I personally think you are asking for a house fire and an awkward story for the firemen. Plus burning plastic is not a fragrance Bath & Body Works will be featuring any time soon.


This is what it looks like when the pot first drops out. You can see that I have pushed my spatula through the back of the tray a few times to get the pot to detach from the tray.


What You Will Need:

- Z Palette, any size will do (available at http://zpalette.com/)
- Magnetic Stickers (some will come with your z palette, otherwise magnetic tape will work)
- Tweezers or a small spatula (purchased with my palettes, worth the extra cost IMO)
- Eyeshadow, any kind or size
- Flat Iron
- Paper Towels
- Parchment paper or tin foil (either will work)
- OPTIONAL: small stickers for labels and a fine tip marker
1. Get Rid of Excess Packaging.
Most pots are contained in a tray that can be separated out from the rest of the packaging (the case that opens and closes). Some are super easy to remove, for example the Urban Decay singles shown are designed to pop out to put into a palette that Urban Decay sells. Others require some work. Look at the packaging for seams and use your tweezers or spatula to pry the tray out. Below I marked where I found it easiest to pry out the tray on the L'Oreal palette.

This is what it looks like when I got the tray out:

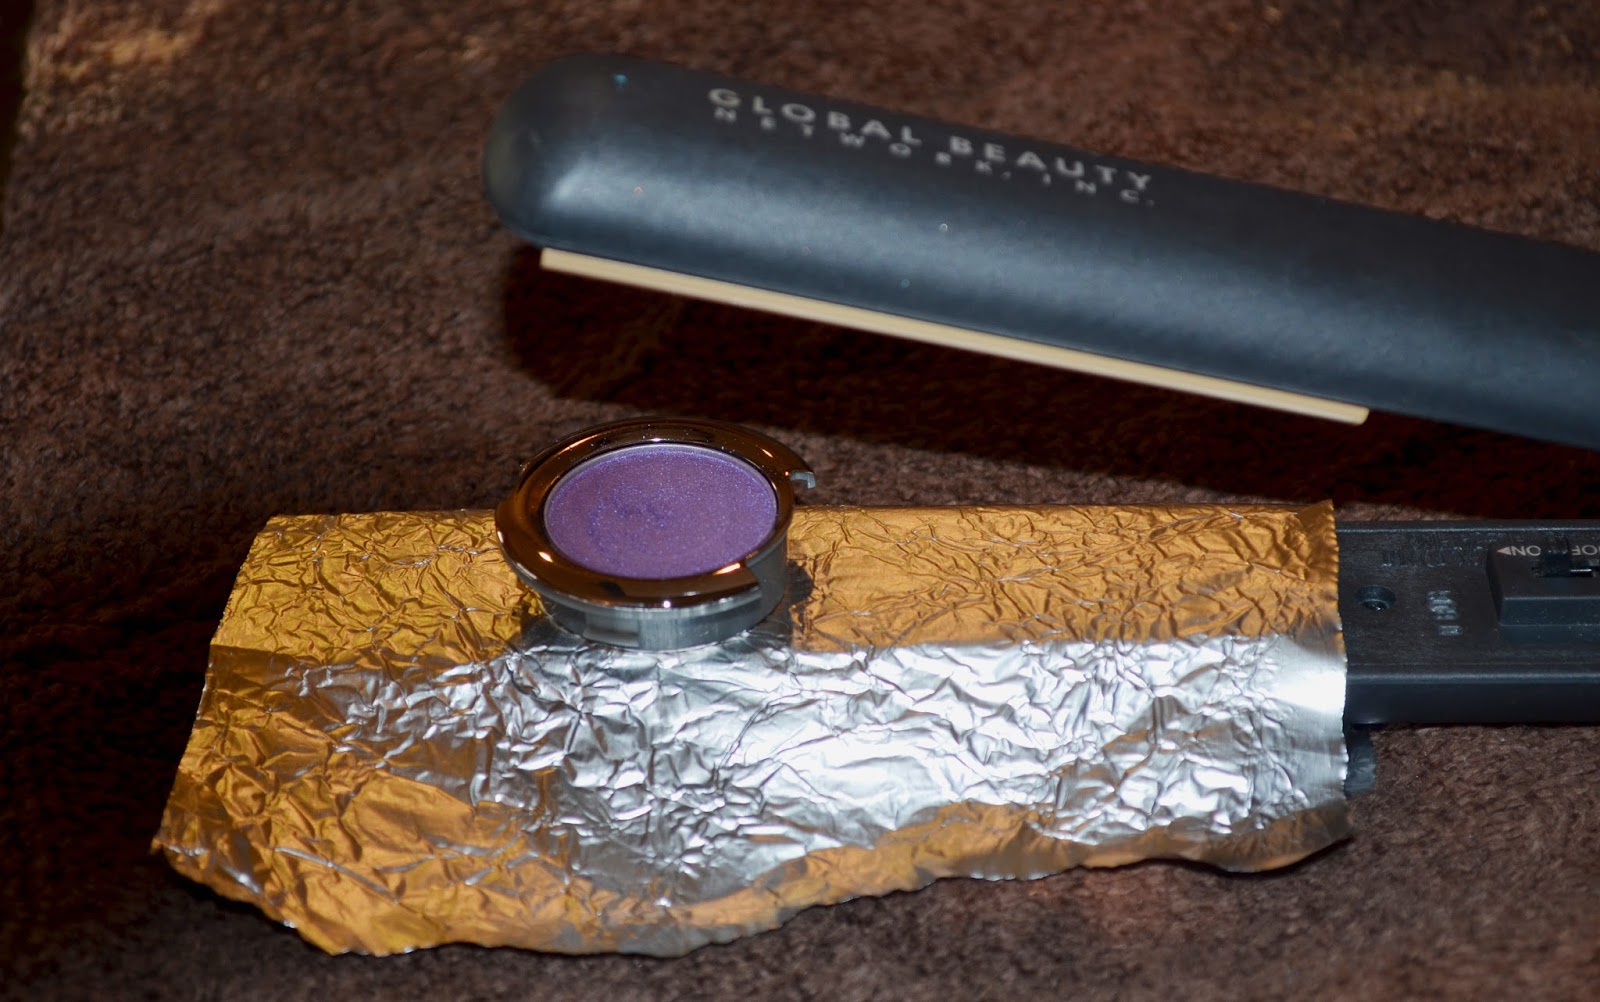
2. Use Heat to Soften the Tray and Glue.
Put a strip of parchment paper or tin foil on your flat iron to protect the surface from adhesive and melted plastic. Then set the tray down on the flat iron and let it start to heat up.
The amount of time it will take for the plastic and adhesive to soften will vary depending on the material used in the packaging. I found it best to check after a minute and a half to see how pliable the plastic was. If it was still hard I would put it back on the iron in increments of 30 seconds just to make sure the plastic didn't get so hot that it would make a mess or burn my fingers.
3. Slowly Push the Pot out of the Tray.
WARNING: The plastic and the pot WILL be HOT - USE CAUTION!
When the plastic was ready it would look a lot like this:

The plastic has heated to a point where it is starting to warp and bubble. It is also easy to push the spatula (or tweezers) through that material.
I like to place the tray FACE DOWN on a paper towel on a hard surface. I then carefully push my spatula through the back of the tray, pushing the pot out. I find doing this helps in two ways. 1. Pushing it out from behind instead of prying from above means I'm less likely to accidentally gouge out a chunk of shadow with my spatula. And 2. I am less likely to burn myself on the plastic, or pot (they are usually metal and will be HOT) and thus less likely to drop the product and have it shatter everywhere.
This is what it looks like when the pot first drops out. You can see that I have pushed my spatula through the back of the tray a few times to get the pot to detach from the tray.

4. Cool and Clean Up the Pot.
There is often some residual adhesive left on the pot so I pick that off once the pot cools down. It is probably easier to do this when the adhesive is still warm, but again, burning hot glue + me = dropped eyeshadow so I let it cool first. I also make a note of what the name of the product was so that I can label it later.

5. Label and Arrange in the Z Palette.
Check to see if the pot is magnetic on it's own. If not you can use magnetic tape or one of the little metal stickers that come with the Z Palette. I also always use a little white sticker (purchased at any office supply store) to label the brand and what color it is. If one was so inclined they could try to salvage the label from the product, but I found that too tedious ( I did the first one for Flash the top right shadow)
The Urban Decay pots are already magnetized so I just added a label sticker to the back:

Look I have room for ONE MORE Urban Decay Shadow.. it must be done! I cant just leave it empty like that!
Sometimes you will come across a nice surprise. For example while getting rid of the extra packaging on these Revealed palettes from Coastal Scents, I found that there was only double sided tape holding the pots to a piece of cardboard. I didn't even have to use heat to remove them from the packaging! But I did have to be super careful not to twist the cardboard as these shadows are really fragile.


That's it Happy De-potting! I'd love to hear what you have done and how you have found ways to use your palettes!


