

Hello everyone and welcome to the inaugural episode of the Pintertest Files! Where once a month I select a crafty DIY Pinterest post, try it out myself, and report back if it worked, if it was easy, or if once again Pinterest lied to us.
Since we are quickly coming up on the new year, for this month's Pintertest I have selected a DIY cover for the ever popular Erin Condren LifePlanner. If you are unfamiliar with these day planners you can check the brand out here. Essentially they are a nice and almost completely customizable day planner. They have removable, plastic covers that you can swap out for different designs, but each cover comes with a pretty heft price tag (starting at $10.95). So of course when I saw that there may be a way to make these covers yourself, I had to try it out.
The following DIY is based on real life events, names and places have been changed to protect identities. Viewer discretion is advised.
What You Will Need:
 |
| Materials needed as listed by original Pinterest tutorial |
- Erin Condren LifePlanner
- Pretty Paper/Photos
- Scotch Self-Seal Laminating Sheets, size 8.5"x11"
- Scissors
- Paper Hole Punch
- Ruler
- Marker or Pen
- Optional - double sided tape
Step 1: Measure and Cut Paper to Match Original Cover Size
 |
| Measure the inside "design" aspect of the cover, not the plastic. |
This is fairly straightforward and easy, simply measure the design element within the original cover (the paper part not the plastic) and cut your new paper to match that size.
Step 2: Use Tape to Adhere Outside Cover Paper to Inside Lining Paper
 |
| Front cover design and inside lining. |
This step was labeled optional, and to be used only if you were planning on using a different design of paper for the inside lining of your cover. This step can be skipped if your cover will consist of only 1 sheet of paper. It was suggest that if you are making a collage of photos for your cover, you adhere them to a backing piece of paper.
Step 3: Laminate The Outside Part of the Cover
 |
| First layer of self laminating material, adhesive side up. |
Pull the backing off one sheet of self laminating material. Place it flat on the work surface, adhesive side up. Next, take your design paper and lay it front side down in the middle of the adhesive sheet. Leave plenty of adhesive material exposed as a border around the paper.
 |
| Application of the first layer of laminating material. |
Again this step was fairly straight forward. The laminating sheets are really static-y and as such want to fold over on themselves when pulling the back off. If proper care is used it shouldn't be an issue, more of a minor annoyance.
Step 4: Laminate the Inside Part of the Cover
 |
| Application of the second layer of laminating material, cover paper 'sandwiched' between sheets. |
Pull the backing of a second sheet of self laminating material. Slowly and carefully place it, adhesive side down, over the paper and first sheet of laminating material. This will create a "sandwich" of laminating material with your designer paper in the middle. Press firmly to remove all air bubbles, and seal around the edges of the paper where the two laminating sheets meet.
This was a bit trickier as you only have ONE shot at this, so you better do it right. Once the laminating sheets are down, there's no pulling them back up or apart. Immediately upon pressing out all the bubbles, it became apparent that a larger clear plastic border will be necessary for this cover (vs the original), as the thickness of the paper prevents the two laminating sheets from meeting up immediately at the edge of the paper.
Step 5: Trim Excess Plastic Away
 |
| Front and back covers, fully laminated and excess plastic trimmed. |
Trim the excess laminating material away. Leave 1/2" margin on the side for hole punches, the remaining 3 sides leave a 1/4" margin.
Even though this step went off with out a hitch, it was at this time I start doubting the structural integrity of this project. The original cover that comes with the planner is so much thicker and sturdier. It's obvious that some kind of thermal plastic is used, not the flimsy plastic sheets utilized in this tutorial. My original cover is showing some wear and tear on the corners and on the punched part where it connects to the spiral planner. If the thick plastic of the original cover can't hold up to daily use, no way is this flimsy laminate material going to.
Step 6: Mark the Locations Where the Punches Need to Go
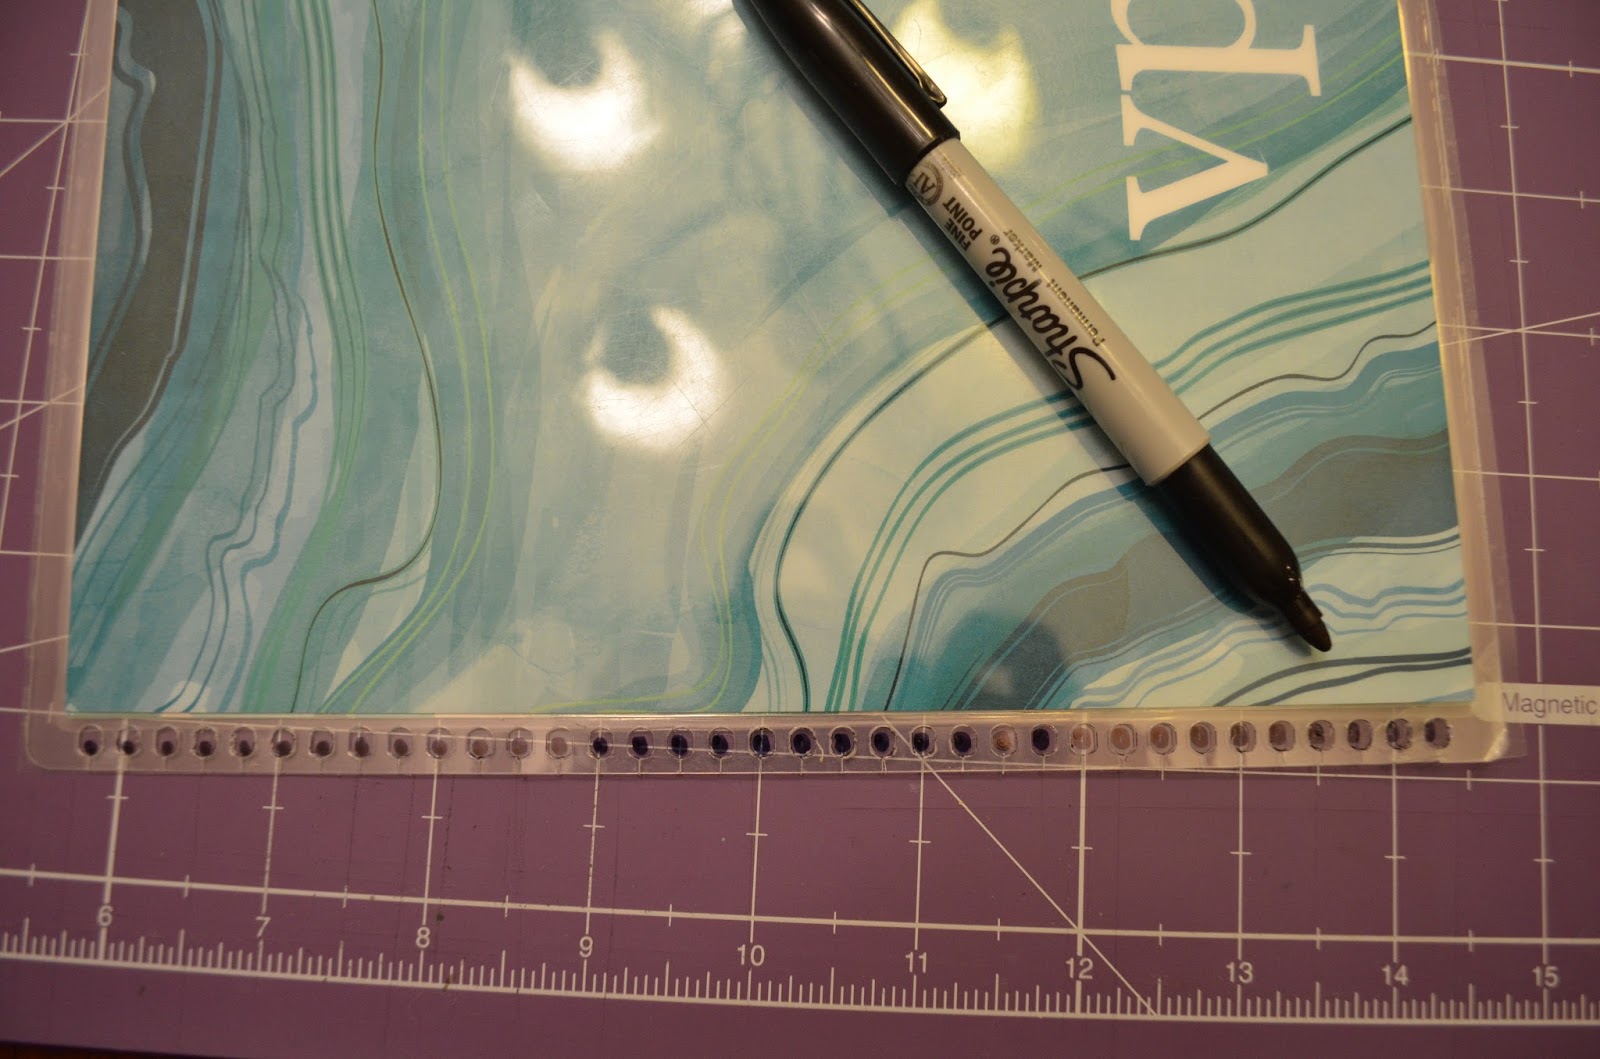 |
| Marking hole punch locations using original cover as a template. |
The beginning of the end. It was at this step that I recognized the first big mistake in the DIY instructions. The holes on the original cover are not basic hole punch holes, but rather are made with a professional binding machine. This is to be expected, clearly a company would use such a machine vs having a bunch of people hand punch holes in the covers. However, the holes in the machine punched covers are smaller than a standard hole punch and the holes are oval, not circular.
Immediately it was obvious that the standard 1/4" hole punch was going to produce holes WAY TOO large for this project. I quickly wrote this off as my own mistake, that I somehow overlooked instructions where it stated that a 1/8" craft punch should be used. But no, the instructions didn't say anything specific about size, just "hole punch."
Also this tutorial claimed all materials could be found in discount stores such as Target or Walmart. Just to explain the hole punch debacle, I actually bought a brand new hole punch from Target (a nice craft one) as my previous hole punch was lost somewhere in our move. There was no size option just a cheap silver version vs a more expensive model. I splurged for the craft version.
Step 7: Punch Out Marked Holes With Paper Puncher aka Where it All Went Down In Flames
 |
| First few punches produced less than stellar results. |
Despite the issues with the hole punch size, I decided to move forward with the project. I don't like to toot my own horn, but usually I can figure out ways to make things work. I thought at worst perhaps I punch out over other hole to make up for the increased size.
 |
| Crafting punch, purchased at Target. |
In hindsight I should have just threw it all away and set it on fire because the next 15 minutes of my life were nothing but a blur of jammed punches, cursing and vowing never to do another project again. Ok, maybe that's a bit dramatic, there WAS cursing though.
 |
| Example of how the plastic material would jam the hole puncher. |
I don't know what type of black magic voodoo cursed crafting wizard the original author of the tutorial was, but there is no way in hell that plastic laminate material was going to cut cleanly with a paper hole punch. There is just no way. The plastic was too flexible. Most of the time it stretched and ripped before the punch could cut it cleanly. Several times it jammed up the punch, requiring me to use considerable force to pry it open.
 |
| Final result of jammed hole puncher. Note how the plastic stretched, then tore. |
Project Grade and Final Thoughts:

There are different types of laminating material offered by Scotch. Including a self laminating pouch and a thermal type that requires a laminating machine. Maybe one of those would work better? Maybe if I had a different paper hole punch? Or maybe the original author sacrificed a goat to the Martha Stewart gods and is now blessed the ability to work crafting miracles (I'm voting on the later).
If you have a Pinterest project that you would like me to test, feel free to comment below or email me at ABeautyintheChaos@gmail.com. Thank you so much for stopping by! See you next week!


0 comments:
Post a Comment