Showing posts with label Kids. Show all posts

Thursday, January 21, 2016

Personal Update: Our Son's Diagnosis


     Hello everyone!  I would like to take a moment and preface this post by first thanking each and every one of you that support me by taking the time to stop by and read my blog.   A Beauty in the Chaos has grown exponentially in readership this past month and I am unbelievably thankful.  Today's post is going to be a little different than my traditional fare.  It is a subject that is incredibly difficult to write or to even speak about, so please bear with me.

     This past Tuesday I had to face a neurologist who looked me in the eyes and told me my child has Spastic Monoplegia Cerebral Palsy.  For my husband and myself, the diagnosis was not a shock.  Our son has been in physical therapy since he came home from the NICU and all signs pointed to some form of Cerebral Palsy.  This was essentially a formality.  Formal documentation of what we had known (feared) all along.

     One would think having some foresight would help ease the news of the diagnosis.  In a way it does.  I can't imagine having this news dropped on me completely unexpectedly.  But, in a different way hearing the confirmation was harder.

     See despite my tendencies to always prepare for the worst outcomes possible, I am at heart an optimist.  These past two years, I have never lost hope that perhaps my son would grow out of the troubles he was experiencing.  That it was for (lack of better definition) just a delay in physical development due to being born 3 months early, a delay he would eventually catch up with. That eventually the physical therapy he gets twice a week, the extra doctors appointments, the shoe inserts, the braces, all of that would be outgrown and left behind.

     When the neurologist said the words Cerebral Palsy, she didn't cast some sort of bleak future for my son (he's in the highest functioning group and his prognosis is good).  And logically I know that ultimately very little has changed for my son, his life continues as it always has.  He will still have a fulfilling future, his path is just a little different now. Yet emotionally I am a wreck.  Because with those two words, that tiny piece of hope died in me.  My son won't outgrow this.  There is brain damage, it is permanent. It's hard to remain optimistic about the future when so often life hacks away at our slivers of hope.

     We as parents try so hard to shelter our children (especially young ones) from the harsh cruelties that life can hand out.   We dread the day when we might have to wipe tears from our son or daughter's face because they were teased at school.  I am terrified of what my son may face due to his apparent difference.  I'm no longer tasked only with raising a strong, compassionate, and confident child, but also finding a way to be strong and confident myself regarding his condition.  To keep my composure when someone makes an offhanded remark regarding his walking or appearance, when what I really want to do is lash out at them about their ignorance.  Because that's what I want my son to learn.  Not just how to deal physically with his condition, but how to deal emotionally with the bullshit he may encounter.

     Again I would like to thank each of you who takes the time to check in here.  Much of this blog is essentially a type of therapy for me as well as a hobby.  Yes, it gives me a forum to express my feelings and thoughts when stuff is bringing me down. But more importantly it provides a space where I can focus on the people and things that make me happy.  Even if it is something as trivial as a new eye shadow palette. Focusing on what makes us happy is sometimes the only way we can combat the chaos that life hands us.

Love and thanks to everyone reading this.  Thank you so much for supporting me an this blog.  I will return next week (if not sooner)!


Tuesday, January 12, 2016

The Pintertest Files: DIY Glitter Slime


    Hello everyone and welcome to the Pintertest Files!  Where I take a popular Pinterest post, test it out, and report back if it worked as promised, how easy it was, and if it is worth trying out yourself.

     January is always a tough month to get through, at least here in Iowa.  The big holidays have passed, there isn't any more vacation time to look forward to, and it is frigid outside  (today's high was 0).  All this adds up to some seriously stir crazy kids that make you realize bears have the right idea when they just hibernate on until spring.

     It's with this desperation for child entertainment that I chose DIY Glitter Slime as our next Pintertest.  The easy 3 item recipe that is posted on every mom blog the Internet wide, promising a colorful sensory playtime favorite that is not only easy to clean up, but impossible to mess up.

     A very special thank you needs to be sent out to my talented helper Gabriel who enthusiastically helped me test out this project and even offered some insight (see below).  Also to my husband who helped take photos when things got a little sticky.


What You Will Need:

Items needed to create slime all available at Wal-Mart 
  • Liquid Starch (I could only find at Wal-Mart)
  • Clear washable glue (with or without sparkles, it doesn't matter)
  • Water
  • Glitter 
  • Measuring Cup
  • Mixing Bowls
  • Spoons or stick to stir with
     All materials are fairly easy to find, save for the liquid starch. I could only find that at Wal-Mart.  Not really an issue except that I had looked in two other stores first before heading there. 

Step 1:  Mix Water and Glue

For glue solution mix 1 container of Elmer's clear washable glue with 1/2 cup warm water

     Measure out 1/2 cup of water, place it in the mixing bowl.  To the water add a full container of the clear washable glue.  Mix until the solution is consistent and clear. 


Fully mixed solution will be clear and slightly thinner than the normal glue texture

Step 2: Slowly Add Liquid Starch to Glue Solution

You will need 1/2 cup of liquid starch, add it to the glue solution bit by bit for easier mixing

     Measure out 1/2 cup of liquid starch. Bit by bit, add the liquid starch to the glue solution and start mixing like you have never mixed before. 


As soon as the liquid starch is added, gel slime starts forming. 


Step 3:  Mix Until Your Arm Falls Off


Solution is fairly easy to mix at first

      Sore yet?  Keep mixing.  The mixture is going to be the delightful texture of baby snot. Pretty soon it will be impossible to stir with the spoon which is when you are ready for the next step...


As more slime develops it becomes increasingly more difficult to stir with a spoon

Step 4:  Ditch the Spoon and Start Mixing With Your Hands


At first the slime is VERY wet and difficult to hold

     I should mention that at the exact point you grab the full blob of mucous-y goodness and start kneading it, it is going to stick absolutely everywhere all over your hands.  You will doubt the ratio of ingredients, you will doubt that this will work.  Hell you will doubt your reasoning skills to involve your 5 year old in this hot mess of a project.  Keep kneading and mixing.  It gets better. 


With continued kneading it gels up but remains very sticky

Keep kneading, eventually it will solidify more and stick to hands less and less

Step 5: Mix in Glitter


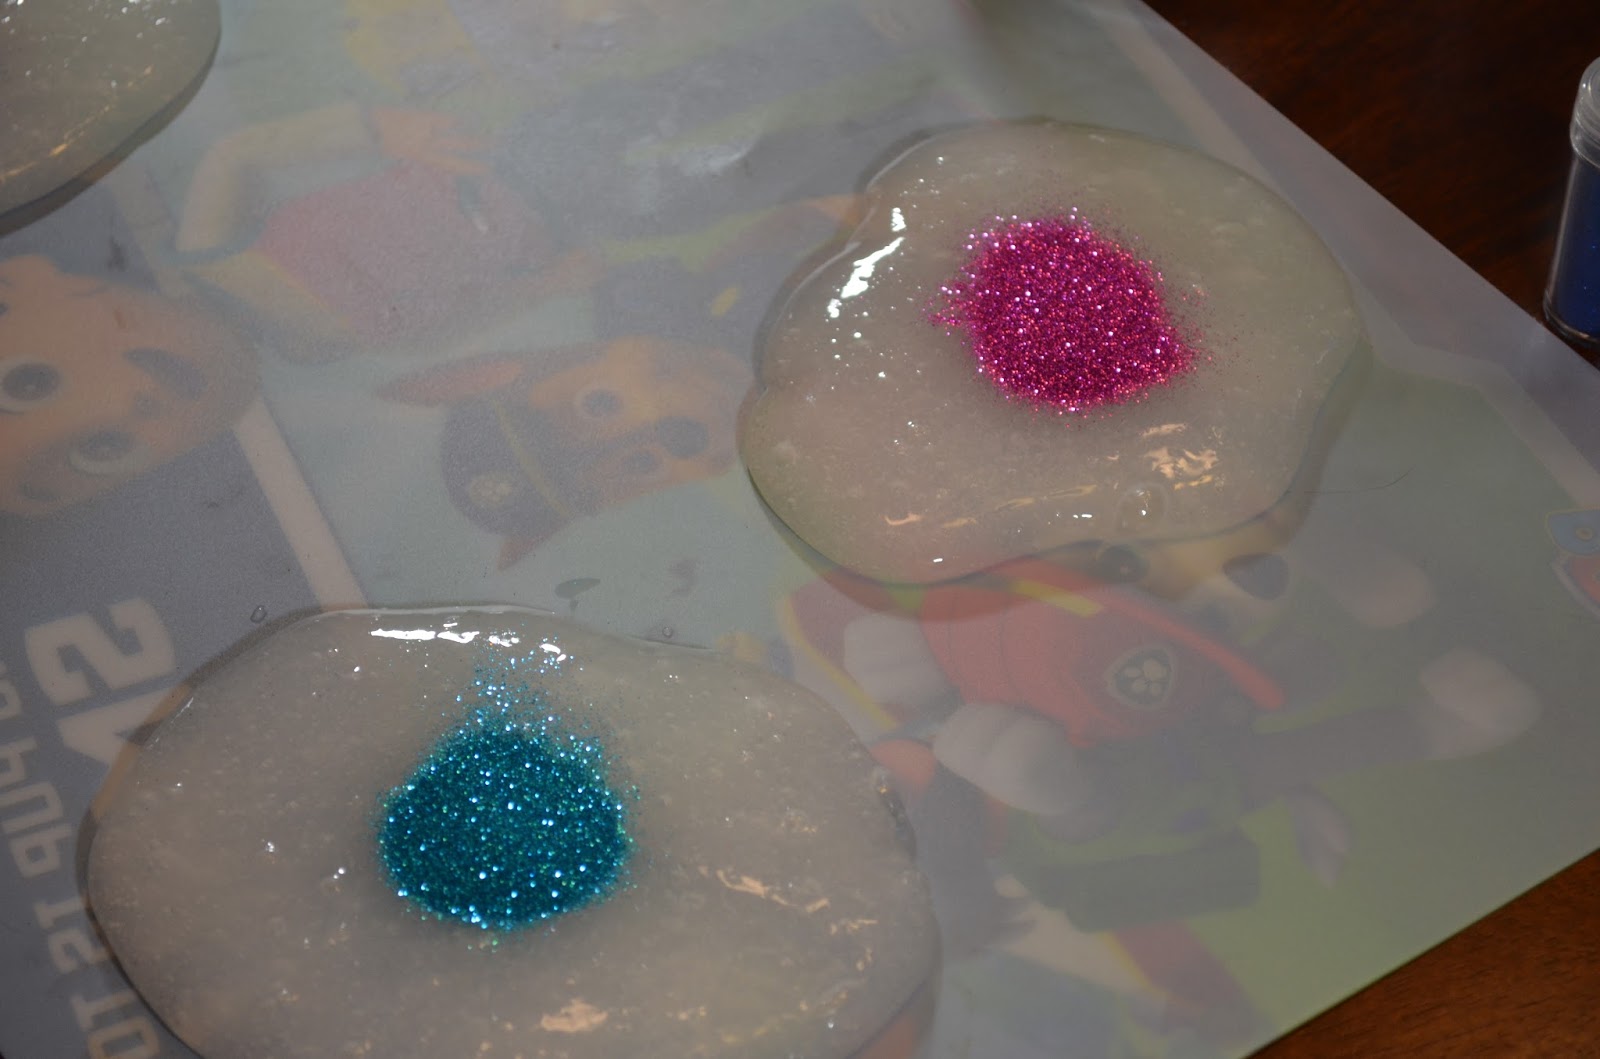
I added glitter by piling it in the middle then folding over to create a pocket, no loose glitter touched hands or work surface

     If you followed step 4 unabashedly like I suggested, you now have a clear-ish slime that doesn't stick to your hands or hard surfaces.  Now is the time to add in glitter.  I found the cleanest way to do this was to flatten out the slime, add a heap of glitter in the center and fold the slime over on itself to entrap the glitter in a pocket.  Then simply knead and work the slime until the glitter is evenly distributed throughout.  


Create unique color combinations by mixing glitter 

    I should mention that I divided the slime mixture out into 4 individual colors.  Gabe decided to mix one giant batch.  The only difference is the amount of glitter required to get the full color effect.  If the intensity of the glitter isn't to your liking you can certainly add more.  You can mix colors to obtain a galaxy or rainbow like effect.  It's really up to you.  


Finished product - All 4 of these colors were made with one divided batch of slime

Step 6:  Storage and Play Precautions:

The peanut gallery didn't partake in the creation of the slime but did play with it afterwards (make sure littles don't eat slime)

     We found through playing with the slime, if it comes into contact with any paper products (in this case a paper towel) it will be impossible to remove.  Therefore slime shouldn't be used around books or important documents.  

     Cleanup of any slime residue was very easy with warm water and a little soap.  The twins got in on playing with the finished product and got some on their clothes (little scraps they pulled off that landed in their laps).  It cleaned up with some warm water. 

     For storage we placed the slime in some zip lock baggies to keep the air out.  As of yet there hasn't been any issues with drying out, although I'm sure with time and continued play the slime will eventually dry out. 


Final Grade and Thoughts:


     This was a complete and total success!   Not only did the slime turn out exactly as expected, but we had a blast as a family making it.  There was a period where the mixture was really sticky and I was concerned that perhaps the ratio of ingredients were off, but true to the tutorials word, the more you mixed and played with the slime, the better the texture got. 

    I asked Gabriel what he thought of the project once we were done, and if he had any suggestions for those of you who are wanting to try this yourself.  Here are some of his thoughts:

 "Making slime was AWESOME!"

"It's kind of messy, you should use a plastic place mat"

"It's gross but feels kind of good" (when we were mixing is while it was very sticky)


    Thank you so very much for stopping by!  If you have a Pinterest  idea that you would like me to test, leave the idea (and preferably a link)  in the comments section below!  Don't forget you can also follow me on Instagram (VPNilausen), Twitter (HawkimamaV), or join me on the A Beauty In The Chaos's Facebook page (here) for additional conversations and fun.  I will see you next week! 


Twitter Delicious Facebook Digg Stumbleupon Favorites More